Support for In-Database JavaScript is one of the most exciting new features in Oracle Database 23ai. JavaScript is the first language supported by Oracle Multilingual Engine (MLE), powered by GraalVM. Oracle APEX was one of the first platforms to support server-side JavaScript. If you want to get started developing using MLE and APEX without having to concern yourself with the installation, using container images is the fastest way to create a lab environment. It can be as simple as podman-compose up. The necessary Oracle REST Data Services (ORDS) runtime will be provided and configured automatically.
If you want even less hands-on work, consider using an Always Free Autonomous Database. As an added bonus all the upgrades will be performed for you so you can focus on developing.
Version History
- 240724: the ORDS container image has been renamed to ords-developer. Please update your compose files.
- 250113: updated entire stack to reflect the most current software releases, switch to Gerald Venzl’s image
- 250330: updated version matrix
- 250627: updated compose files for Oracle Database 23ai Free 23.8 and ORDS 25.1.1/APEX 24.2.0
This post describes a fast path to creating a development lab to experiment with MLE and APEX using compose. Why compose? Because it can be used to consistently tie multiple container images together, including network and and name resolution, with a single command to start and stop containers. Please note that the compose format is not exclusively tied to Docker.
Lab environment
This post was written using Oracle Linux 9.6 (x86-64) and the following components:
- podman-5.4.0
- podman-compose 1.4.0 (manually installed via pip)
- kernel-uek-5.15.0-309.180.4.el9uek.x86_64
If you are using {Docker,Podman} Desktop you may need to bump the backend VM’s memory allocation to a value greater than 4 GB or else your APEX installation may fail..
Container Images
The following container images were used:
| Software | Image location |
|---|---|
| Oracle Database 23ai Free | container-registry.oracle.com/database/free:23.8.0.0 |
| Oracle REST Data Services | container-registry.oracle.com/database/ords:25.1.1 |
Note that the ORDS image has undergone significant change. Beginning with 25.1 it handles entirely differently, including the way it supports the Mongo DB API and APEX installation. This post explains what changed and how to use the image.
Overview
The compose file you’ll see in this article creates two services based on the container images just downloaded:
- oracle: Oracle Database 23ai Free (23.8.0)
- ords: starts an ORDS instance, installs ORDS and APEX, and serves the APEX development environment
The database provided by the container image will automatically create a single Pluggable Database (PDB) named freepdb1 when the container is started for the first time. The ORDS container image will automatically install APEX and ORDS into that PDB.
Ensure you have enough memory and disk space to run both containers.
Compose File: Podman
This compose file is written for rootless Podman with SELinux enabled. It’s hosted on my GitHub to allow for easier updates. It should work almost unchanged for docker-compose, too.
# THIS IS NOT A PRODUCTION SETUP - LAB USE ONLY!
services:
    oracle:
        image: container-registry.oracle.com/database/free:23.8.0.0
        ports:
            - 1521:1521
        environment:
            - ORACLE_PWD=changeOnInstall
        volumes:
            - oradata-vol:/opt/oracle/oradata
            - ./initialisation:/opt/oracle/scripts/startup:Z
        networks:
            - backend
        healthcheck:
            test: [ "CMD", "/opt/oracle/checkDBStatus.sh" ]
            interval: 10s
            timeout: 5s
            retries: 10

    ords:
        depends_on:
            oracle:
                condition: service_healthy
        image: container-registry.oracle.com/database/ords:25.1.1
        environment:
          - CONN_STRING=database_oracle_1/freepdb1
          - ORACLE_PWD=changeOnInstall
        ports:
          - 8080:8080
          - 8443:8443
          - 27017:27017
        volumes:
            - ords-config-vol:/etc/ords/config
            # - ./apex:/opt/oracle/apex:Z

volumes:
    oradata-vol:
    ords-config-vol:

networks:
    backend:
It’s perhaps easiest to clone the Git repository, else you need to change file paths. Once you did, change into the database directory.
mkdir ~/development/ && cd ~/development
git clone https://github.com/martincarstenbach/javascript-blogposts.git
If you are unfamiliar with compose files, I suggest you look at the reference documentation. If you want to install APEX as well, download it and unzip it into database/apex. Ensure the comment is removed from line 34
cd javascript-blogposts/database

curl -Lo apex.zip https://download.oracle.com/otn_software/apex/apex_24.2_en.zip
unzip -q apex.zip
sed -i -e 's|# \(.*\)|\1|' compose-podman-apex.yml
That’s it, you can start the stack next.
You are off to the races!
Unlike earlier ORDs containers the ORDS (and optional APEX) installation is much more streamlined beginning with 25.1. No more need to store config files, everything is done via environment variables. Bring the environment up using
podman-compose -f compose-podman-apex.yml up
Thanks to the latest podman-compose 1.4.0, ORDS won’t start until the database is healthy, and accepts connections. The installation might take a minute or two depending on your hardware but should complete without any further interaction.
After the installation has finished, you can test if it was successful by connecting to ORDS using your favourite browser. How do you know if the installer completed its work? You’ll see something similar to this in the podman logs:
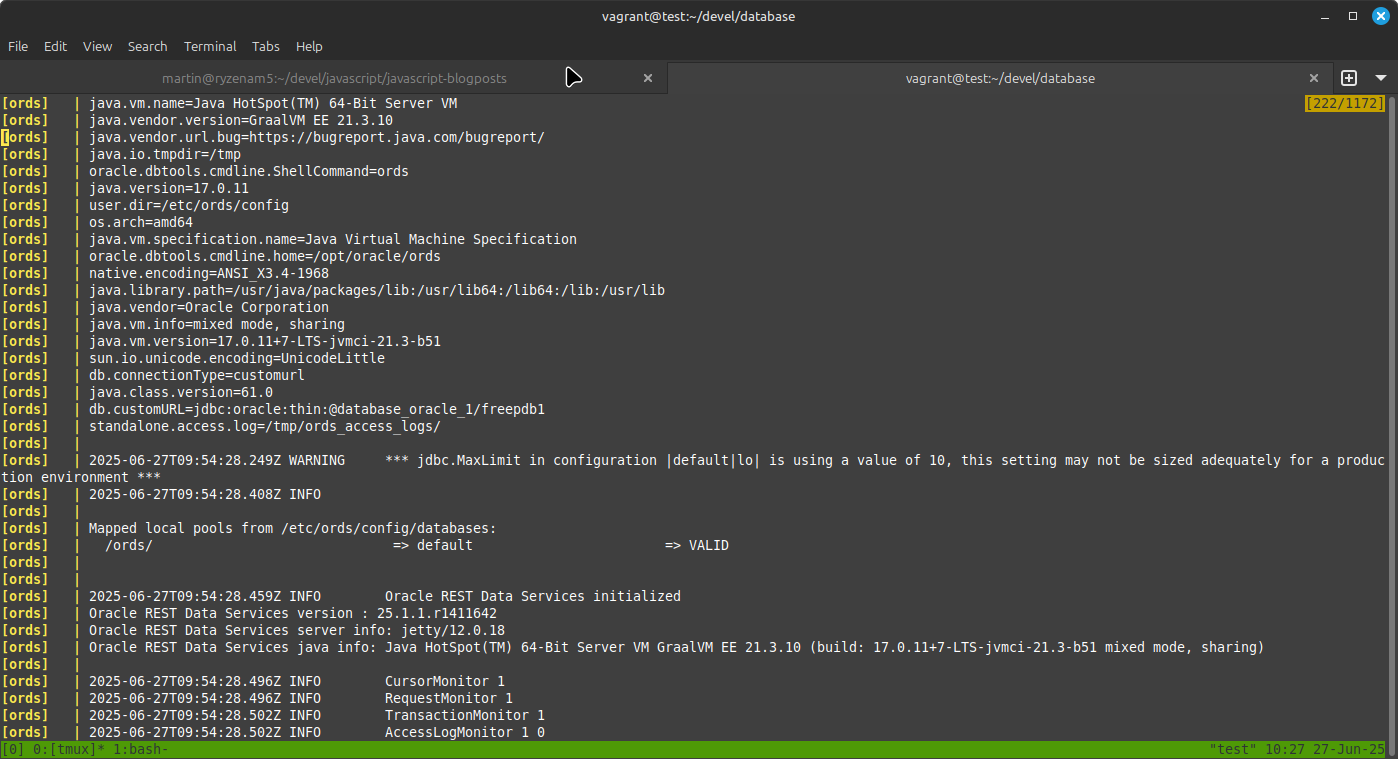
You can now point your browser to the ORDS landing page on localhost:8080. By the way, this is one of the reasons this setup is insecure – no TLS configured!
Immediate Post-Installation Tasks
Once you’re happy that your installation completed successfully you should change the APEX admin password to a value of your liking as per the documentation.
You can access the APEX development environment on port 8080 (or 8443 if you enabled TLS security). The MongoDB API is also available on port 27001.
Next Steps
After the validation of your environment, you should strongly consider
- Changing all passwords in the database
- Adding TLS to the ORDS container
- Experimenting with server-side JavaScript in APEX :)
You stop the environment using podman-compose -f compose-podman-apex.yml down. When it’s down you start everything using podman-compose -f compose-podman-apex.yml up -d. Thanks to the database healthcheck and the depends_on directive, ORDS won’t start before the database is healthy.
Summary
Podman compose is a great way to bring up multiple containers on a developer laptop. The dependency mechanism ensures that ORDS starts before the database accepts connections, and the entire process is fully automatic. Podman secrets ensure that no confidential information leaks into version control – an altogether nice developer experience.
Happy coding!

You must be logged in to post a comment.