Oracle APEX, or APEX for short, is a highly successful and equally popular low-code platform. Thanks to the tight integration with the Oracle database, APEX has always supported SQL and PL/SQL. But it didn’t stop there.
JavaScript Support in APEX
APEX has been one of the first platforms to support In-Database JavaScript, a new option for writing server-side code in addition to PL/SQL and Java (stored procedures). A new component recently added to the Oracle Database, called Multilingual Engine (MLE), powered by GraalVM, enables developers to repurpose their JavaScript skills to write server-side code.
This post shows how to use the popular validator.js module to validate user input in APEX. What’s nice about that feature is that you can also use the same logic you might want to use for client-side validation in the database.
> Please refer to validator’s GitHub project site for more details about the project’s license and implications of use. The article assumes your legal and IT Security departments (as well as any other party) agree that using the module in your code is safe. Using a 3rd-party code in your application typically requires completing specific compliance steps outside this article’s scope.
Setup
If you want to follow along, you need an instance of Oracle Database 23c Free running on Linux x86-64. You also need a working installation of APEX 23.2. If you have neither of them available, you might want to have a look at a previous article explaining how to use Docker compose to create a lab environment with minimum effort. Further information about the APEX installation can be found in the installation guide.
Once APEX is available, log in as the admin user and create a workspace. Creating a workspace is the first thing you are prompted to do after logging in as the APEX admin. My workspace is called demows. You will also create an admin user for that workspace as part of the wizard. Once the workspace is created, log out of the admin interface and into the workspace using the following to log in
- The workspace name you just created
- The admin username you created
- The corresponding password
You are now logged into the APEX development environment. More information about administering APEX can be found in the documentation set.
During the workspace creation, you created a new schema or used an existing one to store the application’s objects. The schema owner needs a few additional grants to work with server-side JavaScript. As an administrator, log in to the Pluggable Database (PDB) used for the APEX installation (e.g. freepdb1) and make sure the following JavaScript specific privileges/roles have been granted:
- db_developer_role
- execute dynamic mle
- execute on javascript
You will of course require others like create session etc.
Creating the MLE module and other schema objects
Congratulations! The hard work is over. Let’s focus on creating an application. Please click on SQL Workshop > SQL Commands and enter the following DDL statement:
create table person (
    id                number generated by default on null as identity
                      constraint person_id_pk primary key,
    first_name        varchar2(255 char) not null,
    middle_name       varchar2(255 char),
    last_name         varchar2(255 char) not null,
    address_line_1    varchar2(255 char) not null,
    address_line_2    varchar2(255 char),
    post_code         varchar2(32 char) not null,
    town              varchar2(255 char) not null,
    email_address     varchar2(255 char) not null
);
> This isn’t a very good data model for storing people’s addresses in the database for reasons not in the scope of this article. It does provide the bare minimum for this blog post, though.
Submit the create table statement. Let’s create the MLE module, click on SQL Workshop > Object Browser.
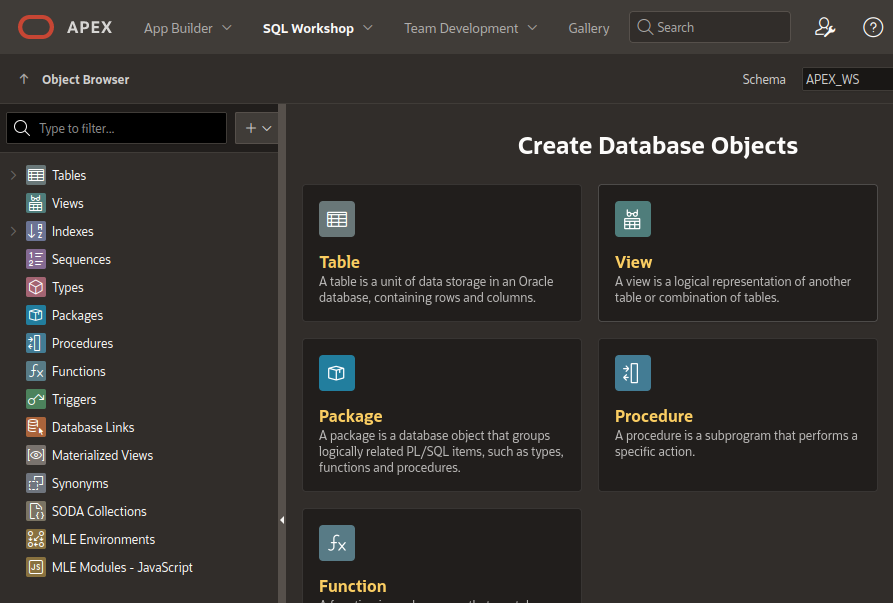
You see MLE Modules – JavaScript in the tree on the left. Right-click it and select Create MLE Module – JavaScript. Switch to the URL tab and provide the URL for the ESM module, as shown in the screenshot. Rather than using latest, you see the exact version specified in the URL, which is generally a good idea to avoid nasty surprises should a newer version introduce breaking changes.
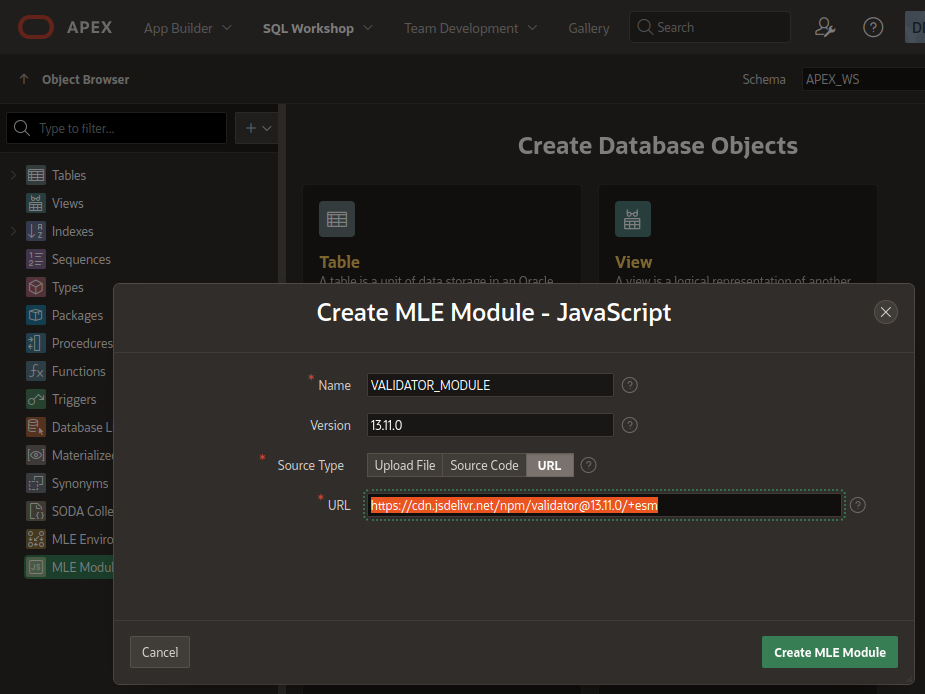
Click on Create Module to create the MLE module in the database. You also need an MLE environment allowing APEX to resolve import statements used in a later part of this article. Right-click on MLE Environments and select Create MLE Environment.
- Name the environment
VALIDATOR_ENV - Leave language options blank
- Click the Create button
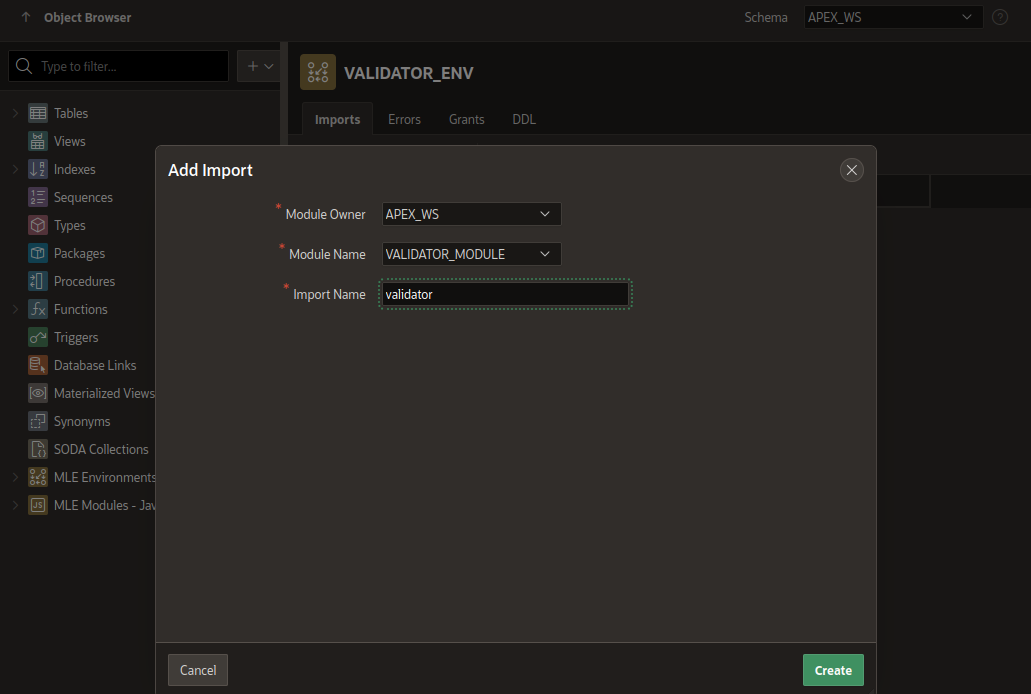
Expand the MLE Environments node and click VALIDATOR_ENV to open the environment’s details page. Currently, the environment is empty; you must add an import name by clicking Add Import. Complete the dialogue by setting the following properties:
- Module owner to your workspace schema
- Module name to
validator_module - Import name to
validator
A click on Create creates the import.
You can read more about MLE Modules and Environments in Chapter 2 of the MLE JavaScript Developer’s Guide.
Creating the APEX application
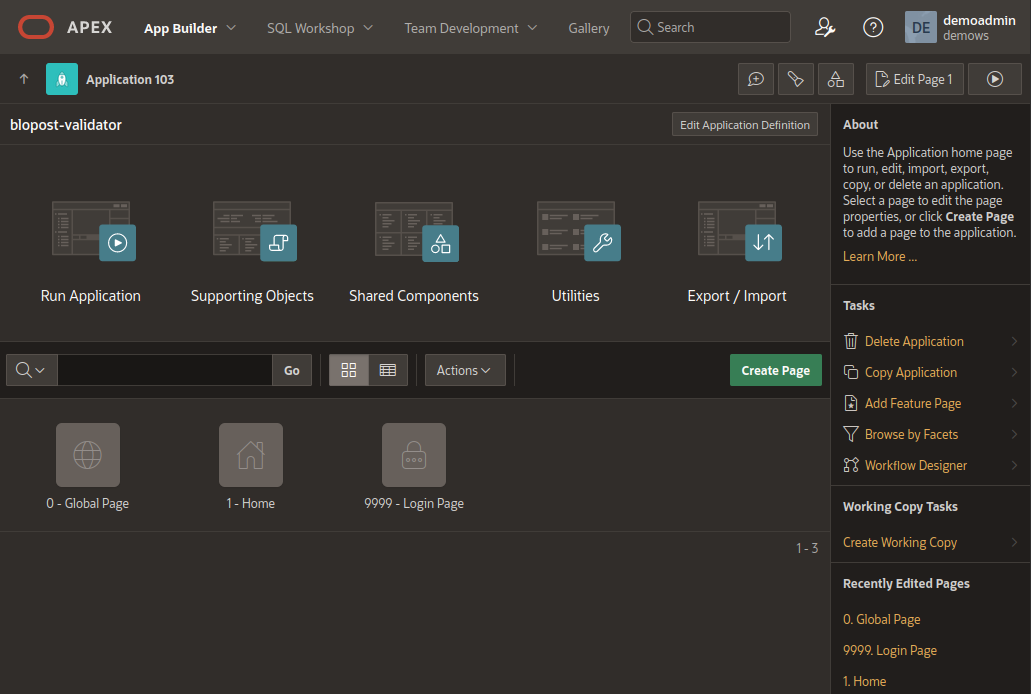
The stage is set to finally use the validator module’s isEmail() function in a validation. Click on App Builder > Create to start creating the app. Just give it a name and hit Create Application. You find yourself in the App Builder interface.
 .
.
Defining the MLE Environment
APEX must be told which MLE environment to use by default, so let’s set that now. Navigate to Shared Components > Security Attributes > Security. Scroll down until you find a section titled Database Session. Set the MLE Environment to the newly created VALIDATOR_ENV as shown in this screenshot:
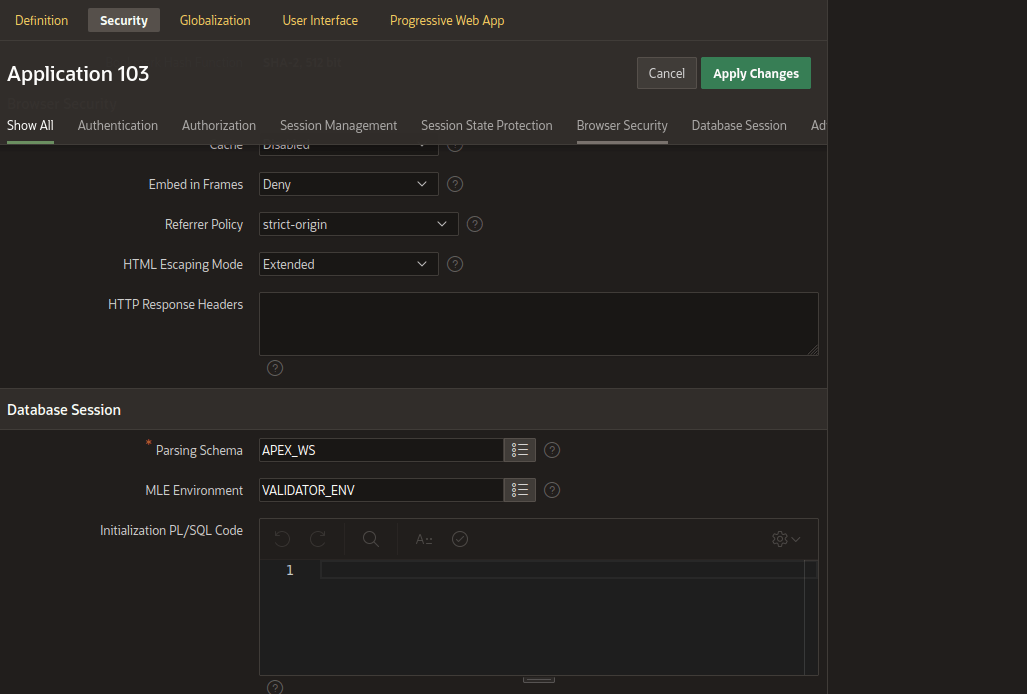
Don’t forget to apply the changes.
Creating the user interface
Let’s create the UI. Scroll all the way backup, then click on your application name in the top left corner (application nnn). Create the report and form by clicking on Create Page, followed by Classic Report.
- Name the page Person
- Select Include Form Page (which you should name Edit Person)
- Assign the Person table as the data source
- Leave the remaining settings at their defaults
- Finally, click Next.
The Primary Key column should automatically be detected as ID. Hit Create Page.
APEX will create two pages for you now: the classic report (should be page #2) and the form (page #3). The classic report displays information; the form page is used for creating new rows in the table or editing existing ones. Both creating and editing can benefit from the validation.
Navigate to page number 3 using the page finder at the top. You should see the form named Edit Person in the components tree on the left.
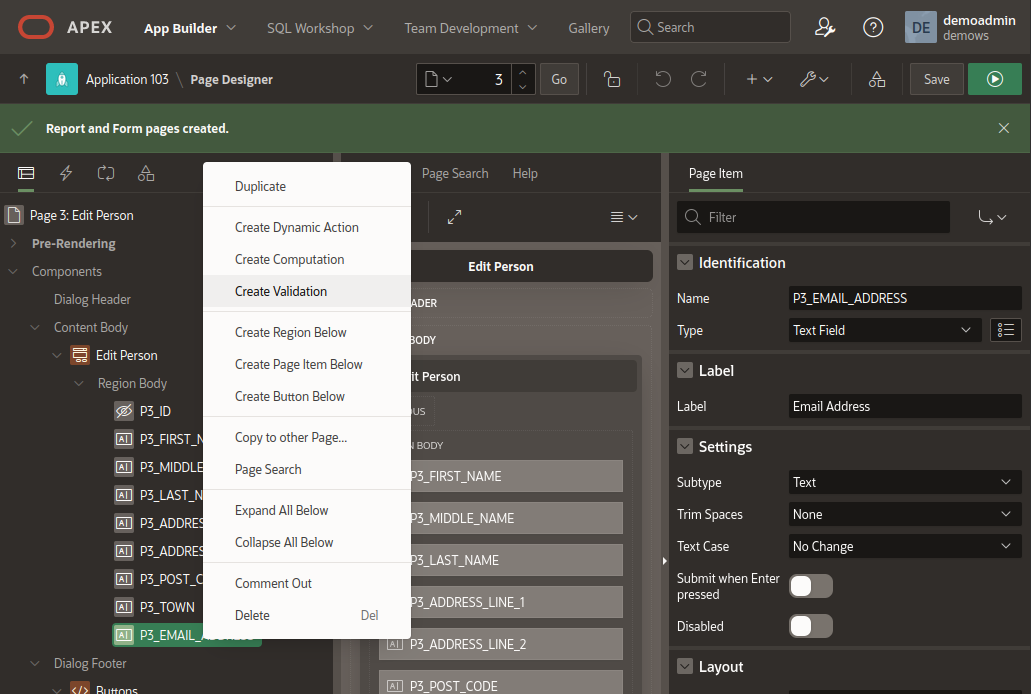
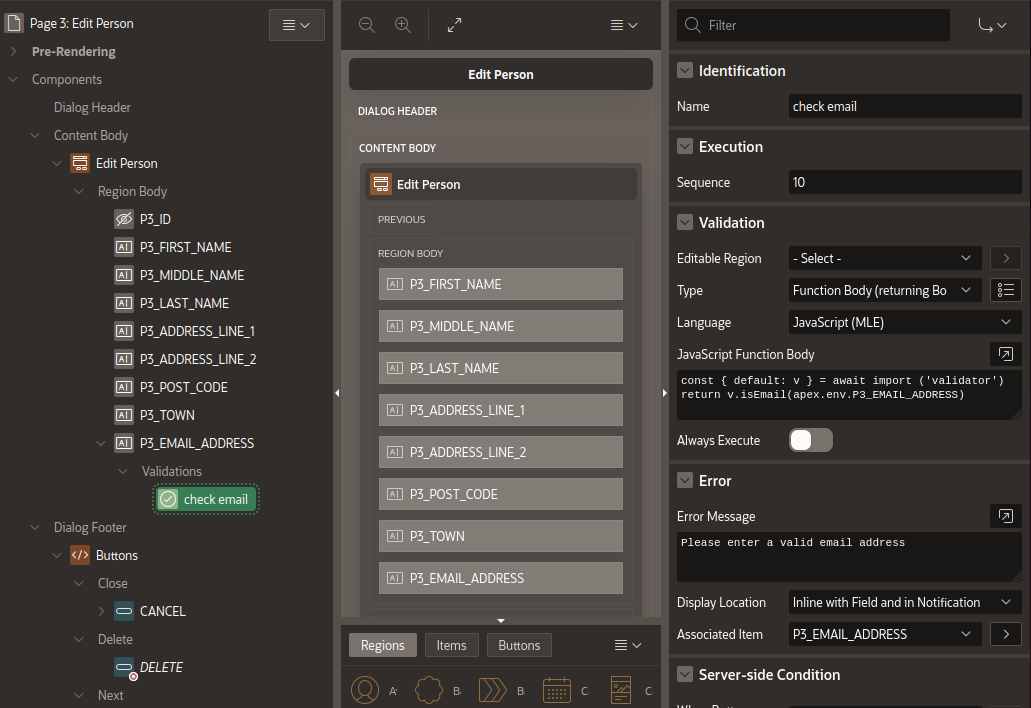
Right-click on P3_EMAIL_ADDRESS and select Create Validation. Create the validation as shown:
- Name the validation
check email - Add an error message
- Set the validation properties to
- Type: function body (returning boolean)
- Language: JavaScript (MLE)
- JavaScript function body to
const { default: v } = await import ('validator');
return v.isEmail( apex.env.P3_EMAIL_ADDRESS );
Don’t forget to save.
The completed validation can be seen in this screenshot:
Validations in action
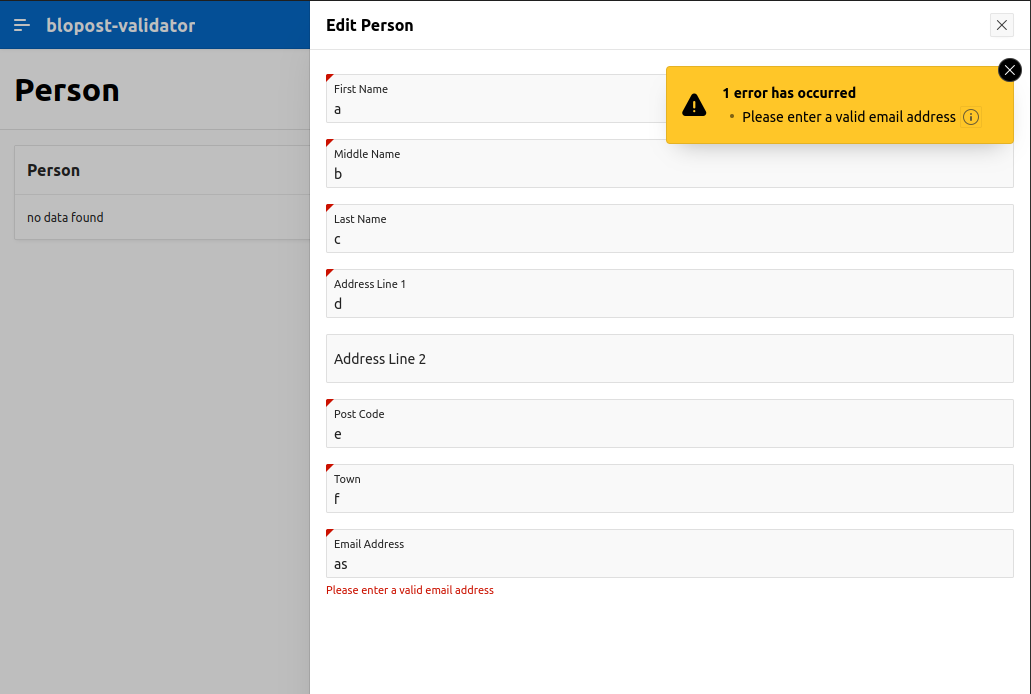
Navigate to page number 2 (the classic report) and run the page (Alt-F8). Click on the create button to create a new entry to the table and see the validation in action.
In case of an invalid email address, the validation fires:
 .
.
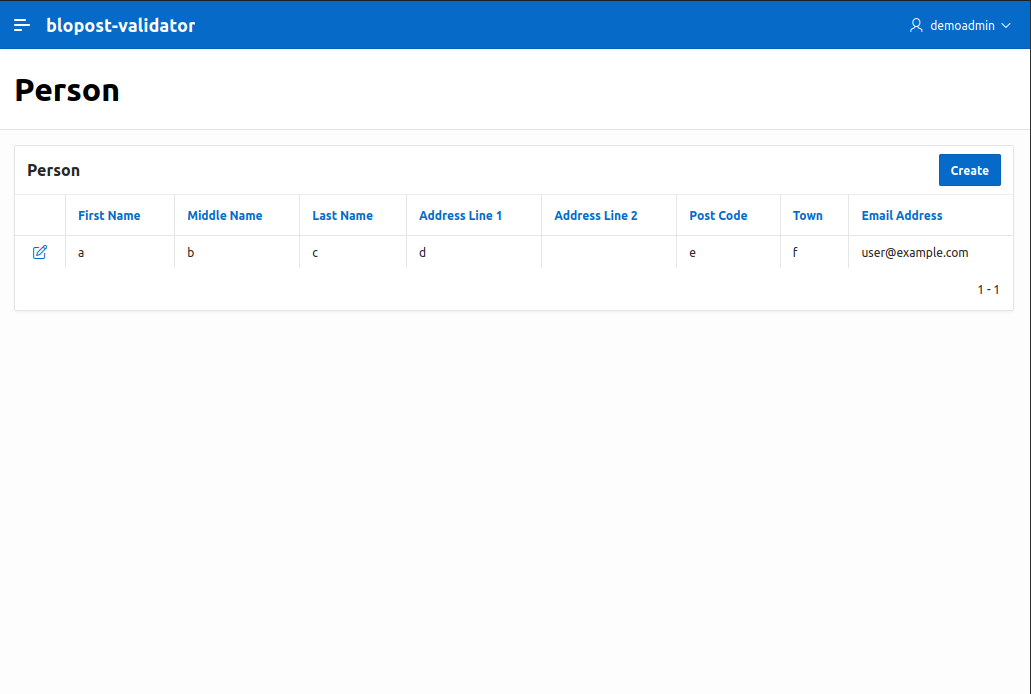
As soon as you enter a valid email address, the record can be created and is shown:
Summary
JavaScript modules available on NPM are a great time saver, provided their licenses are compatible with your project. This post showed how to create MLE modules in APEX and use their functionality in a page item validation.
This isn’t the end of the story, of course; MLE JavaScript can be used in many more places in APEX. Future blog posts will tell :)