Dev containers are pretty nifty when it comes to keeping your development environment isolated from the rest of your system. Quoting from the documentation:
Development containers, or dev containers, are Docker containers that are specifically configured to provide a fully featured development environment. Whenever you work in a codespace, you are using a dev container on a virtual machine.
Introduction to dev containers
You can configure the dev container for a repository so that codespaces created for that repository give you a tailored development environment, complete with all the tools and runtimes you need to work on a specific project.
I use the dev containers VSCode extension a fair bit, especially when developing Ansible playbooks or Java applications. You may not know that you can add a database to the setup, at least I wasn’t initially aware of that. So let’s have a look how to use your Java application together with a database. This is of course just one example, you can use dev containers and Codespaces with many other languages, too.
I am reusing my Java blogpost Github repository for this article, extending it with a database configuration. After all, I wanted to demonstrate how to instrument your Java code when connecting to a database.
This example is based on VSCode – there are certainly more Java IDEs around, but VSCode works for my (admittedly limited) purposes.
Get the extension
I use the following set of extensions in VSCode to create/run dev containers:
- Microsoft’s Container Tools (works with both podman and docker)
- Microsoft’s Dev Containers
These 2 should be enough to get started. Remember to change your settings to enable podman if you aren’t using docker. Refer to the extensions’ documentation how to do so.
Configure the dev container
With the extensions installed, it’s time to create the configuration file – it defaults to .devcontainer/devcontainer.json. You don’t need to create it though, the VSCode extension takes care of that in a simple, guided, workflow. Start by opening your project folder. Don’t forget to create a new branch in Git to avoid messing up your code base. You are ready to go!
Start the Integration of your dev container to the project by opening VSCode’s command palette and enter “Dev Containers: add dev container configuration files”. You will now be prompted for answers for a few times, these worked for me:
- Pick the relevant template/starter image. In this case, it’s Java
- Select which JDK version you want to run, I chose openJDK bullseye
- Since I use maven rather than gradle, I opt to have that build tool installed
- Crucially, ensure that you also add Docker in Docker
- I kept the defaults and added the configuration to my workspace
After you responded to the last prompt you’ll get a new dev container configuration file in your project root’s .devcontainer/devcontainer.json file. This is what it looks like:
// For format details, see https://aka.ms/devcontainer.json. For config options, see the
// README at: https://github.com/devcontainers/templates/tree/main/src/java
{
	"name": "Java",
	// Or use a Dockerfile or Docker Compose file. More info: https://containers.dev/guide/dockerfile
	"image": "mcr.microsoft.com/devcontainers/java:1-21-bullseye",

	"features": {
		"ghcr.io/devcontainers/features/java:1": {
			"version": "none",
			"installMaven": "true",
			"installGradle": "false"
		},
		"ghcr.io/devcontainers/features/docker-in-docker:2": {}
	}

	// Use 'forwardPorts' to make a list of ports inside the container available locally.
	// "forwardPorts": [],

	// Use 'postCreateCommand' to run commands after the container is created.
	// "postCreateCommand": "java -version",

	// Configure tool-specific properties.
	// "customizations": {},

	// Uncomment to connect as root instead. More info: https://aka.ms/dev-containers-non-root.
	// "remoteUser": "root"
}
Adding the database
So far so good. Let’s add a simple compose file to spin a database up using the postCreateCommand. I reused one I had created previously and committed it to my project.
Configuring extensions for use in the dev container
Unless you say otherwise, the dev container’s VSCode installation doesn’t come with any extensions preinstalled. Rather than waiting for VSCode to prompt me to install the relevant extensions for Java and database development, I add the dependencies to the customizations directive. The bare minimum for me consists of:
- Oracle SQL Developer extension for VSCode
- The Java collection by RedHat
Just add anything else you want and need to the customization object.
Verification
My final devcontainer.json file looks like this.
// For format details, see https://aka.ms/devcontainer.json. For config options, see the
// README at: https://github.com/devcontainers/templates/tree/main/src/java
{
	"name": "Java",
	// Or use a Dockerfile or Docker Compose file. More info: https://containers.dev/guide/dockerfile
	"image": "mcr.microsoft.com/devcontainers/java:1-21-bullseye",

	"features": {
		"ghcr.io/devcontainers/features/java:1": {
			"version": "none",
			"installMaven": "true",
			"installGradle": "false"
		},
		"ghcr.io/devcontainers/features/docker-in-docker:2": {}
	},

	// Use 'forwardPorts' to make a list of ports inside the container available locally.
	// "forwardPorts": [],

	// Use 'postCreateCommand' to run commands after the container is created.
	"postCreateCommand": "docker compose up -d",

	// Configure tool-specific properties.
	"customizations": {
		"vscode": {
			"extensions": [
				"oracle.sql-developer",
				"vscjava.vscode-java-pack"
			]
		}
	}

	// Uncomment to connect as root instead. More info: https://aka.ms/dev-containers-non-root.
	// "remoteUser": "root"
}
Time to give the entire setup a go!
Starting the dev container
Open the VSCode command palette again, and select “Dev Containers: rebuild without cache and reopen in container”. After a short while you are connected to your dev container. It should feature a running database. Applications can connect to the demouser account with the password you chose. And that’s exactly what’s happening next.
Running the application
The hard part has already been completed, next up: verifying and running the application. The first part is simple: thanks to the Java extension I can run the Maven verify command. It pulls all the required dependencies into the dev container.
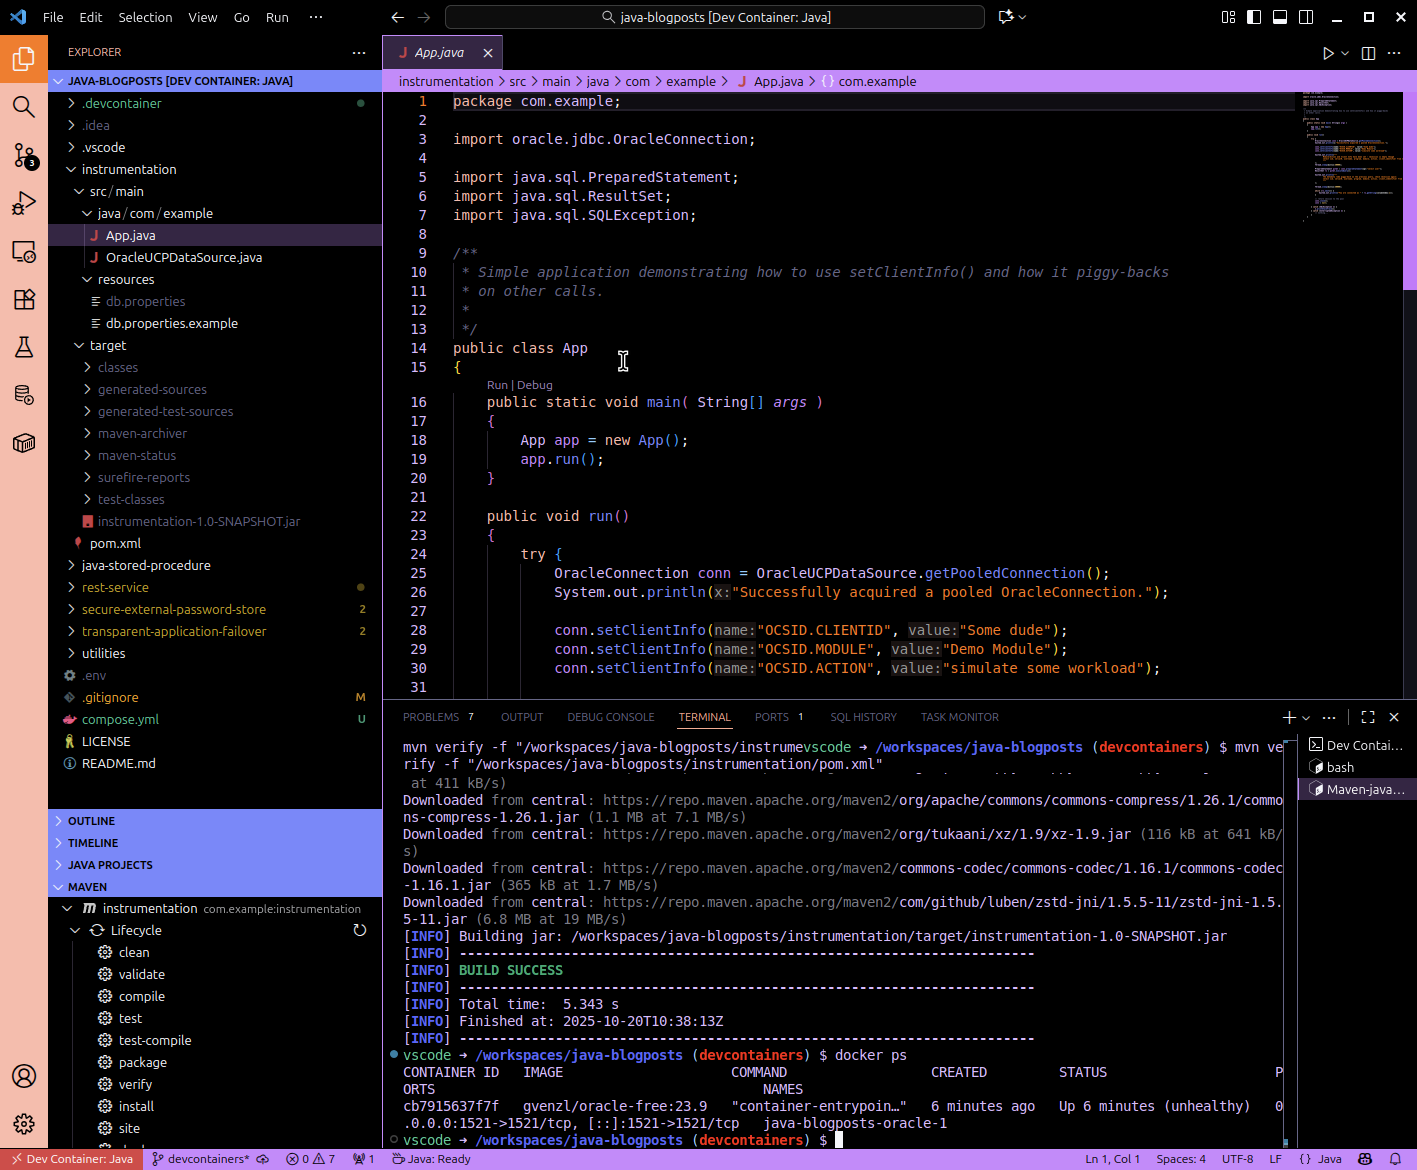
Next up is the test of my Java application: With the database up and running, and all dependencies downloaded, it’s as simple as clicking on Run (above the main() function) to start the app. Or you use whatever else your preferred method is to start the application.
Happy development!

You must be logged in to post a comment.