GitHub’s MCP Server is a great tool for interacting with GitHub using natural language. It’s fun to use, it can boost your productivity, and it is particularly useful when your agent needs to work with a remote repository.
This article walks through how to use GitHub’s MCP Server with Codex, based on personal experience.
Create a Personal Access Token
First, you need to create a personal access token (PAT). The token determines what the MCP Server has access to, and you cannot be too strict reigning the LLM’s/MCP Server’s access in.
The GitHub docs do a great job of explaining the process and the risks. Make sure you refer to that guide, and do NOT ignore the security advice on the page 😬 It’s always better to be safe than sorry. If in doubt, check with the security team if you’re allowed to use the MCP Server in the first place.
Adding the MCP Server to config.toml
There are several ways to configure the MCP Server for use with Codex. Adding the configuration to ~/.codex/config.toml is probably the easiest. Refer to the Codex documentation for the full set of configuration options. This article assumes that you are happy to add the GitHub MCP Server to your user profile.
To do that, open ~/.codex/config.toml in your favourite editor, then add this snippet (link to docs):
[mcp_servers.github]url = "https://api.githubcopilot.com/mcp/"bearer_token_env_var = "GITHUB_PAT_TOKEN"
Note that you do not need to paste the actual value of your PAT into the configuration.
This directive tells Codex to read the token from an environment variable named GITHUB_PAT_TOKEN. Export that variable before you start Codex, and the MCP Server will pick up the token value from there.
Using the MCP Server with Codex
Let’s have a look at how you can actually use the MCP Server with Codex, from a command line perspective as well as the VSCode Plugin’s point of view.
Codex on the command line
The easiest way to use the MCP Server is from the command line. Simply export the GITHUB_PAT_TOKEN environment variable, then start Codex.
export GITHUB_PAT_TOKEN="github....."codex
Codex should start and initialise each MCP Server. In my case, that means the SQLcl MCP Server and GitHub’s MCP Server.
Use the /mcp command to check the status of the MCP Servers. Here is some sample output:
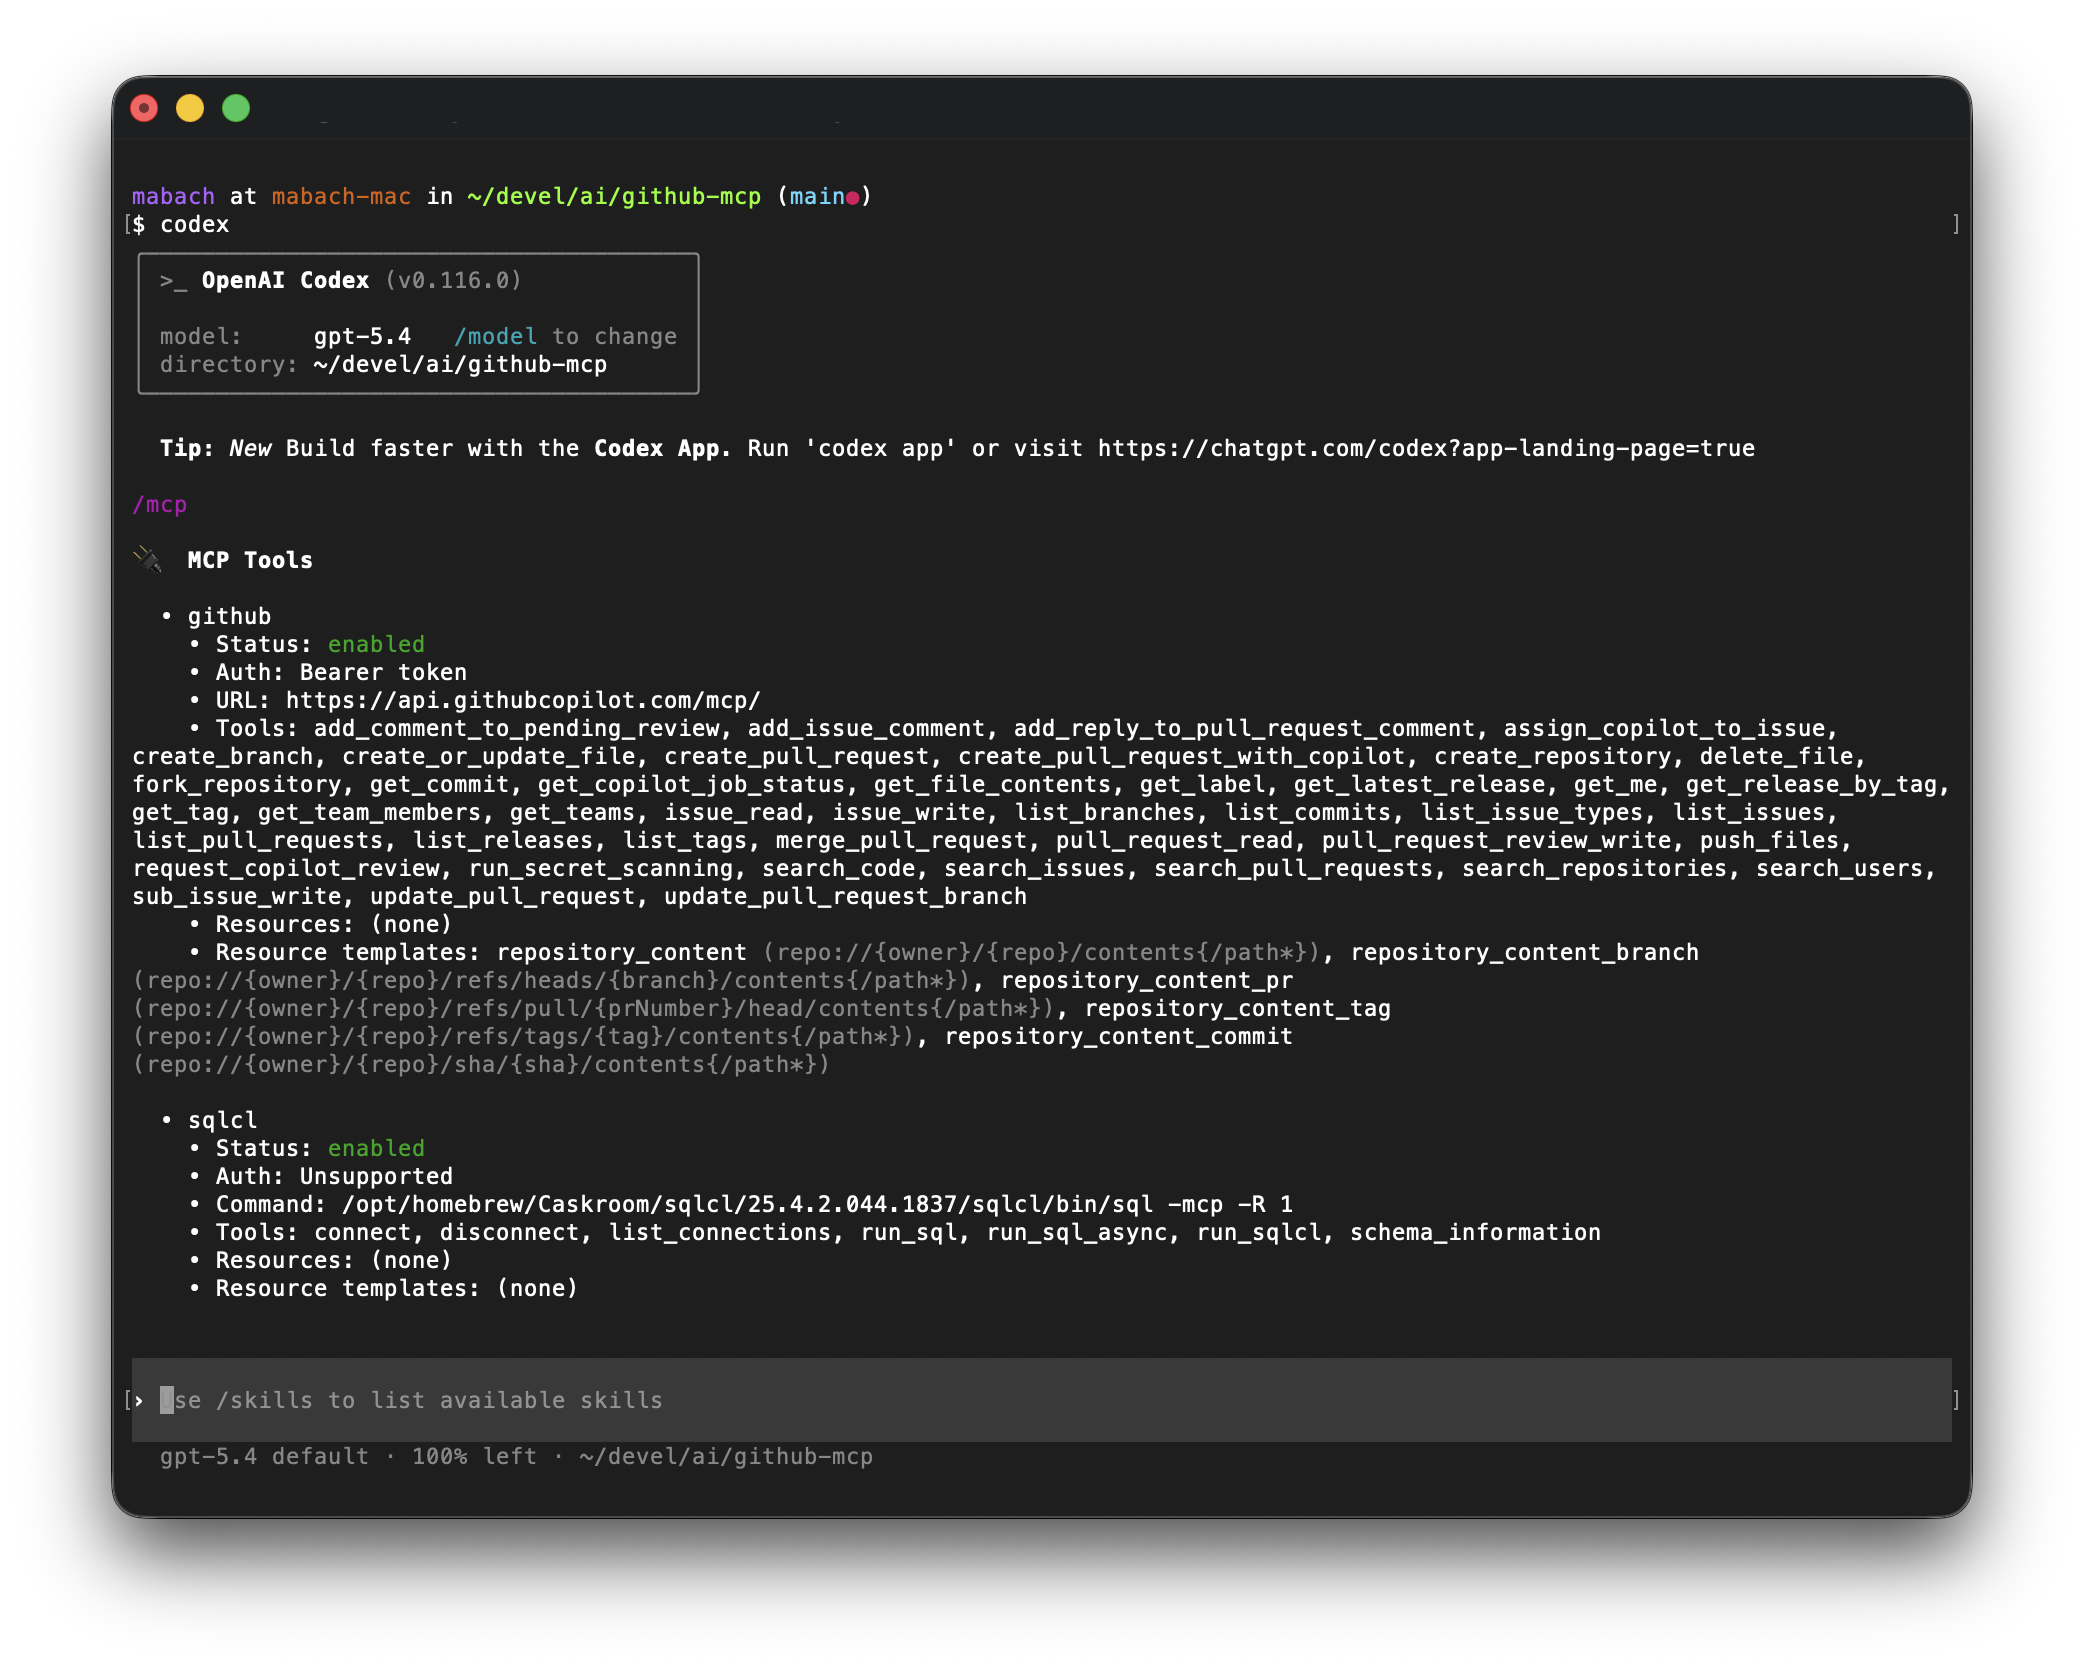
In my experience, the MCP Server is ready once its tools have been discovered. That is the case in the output above.
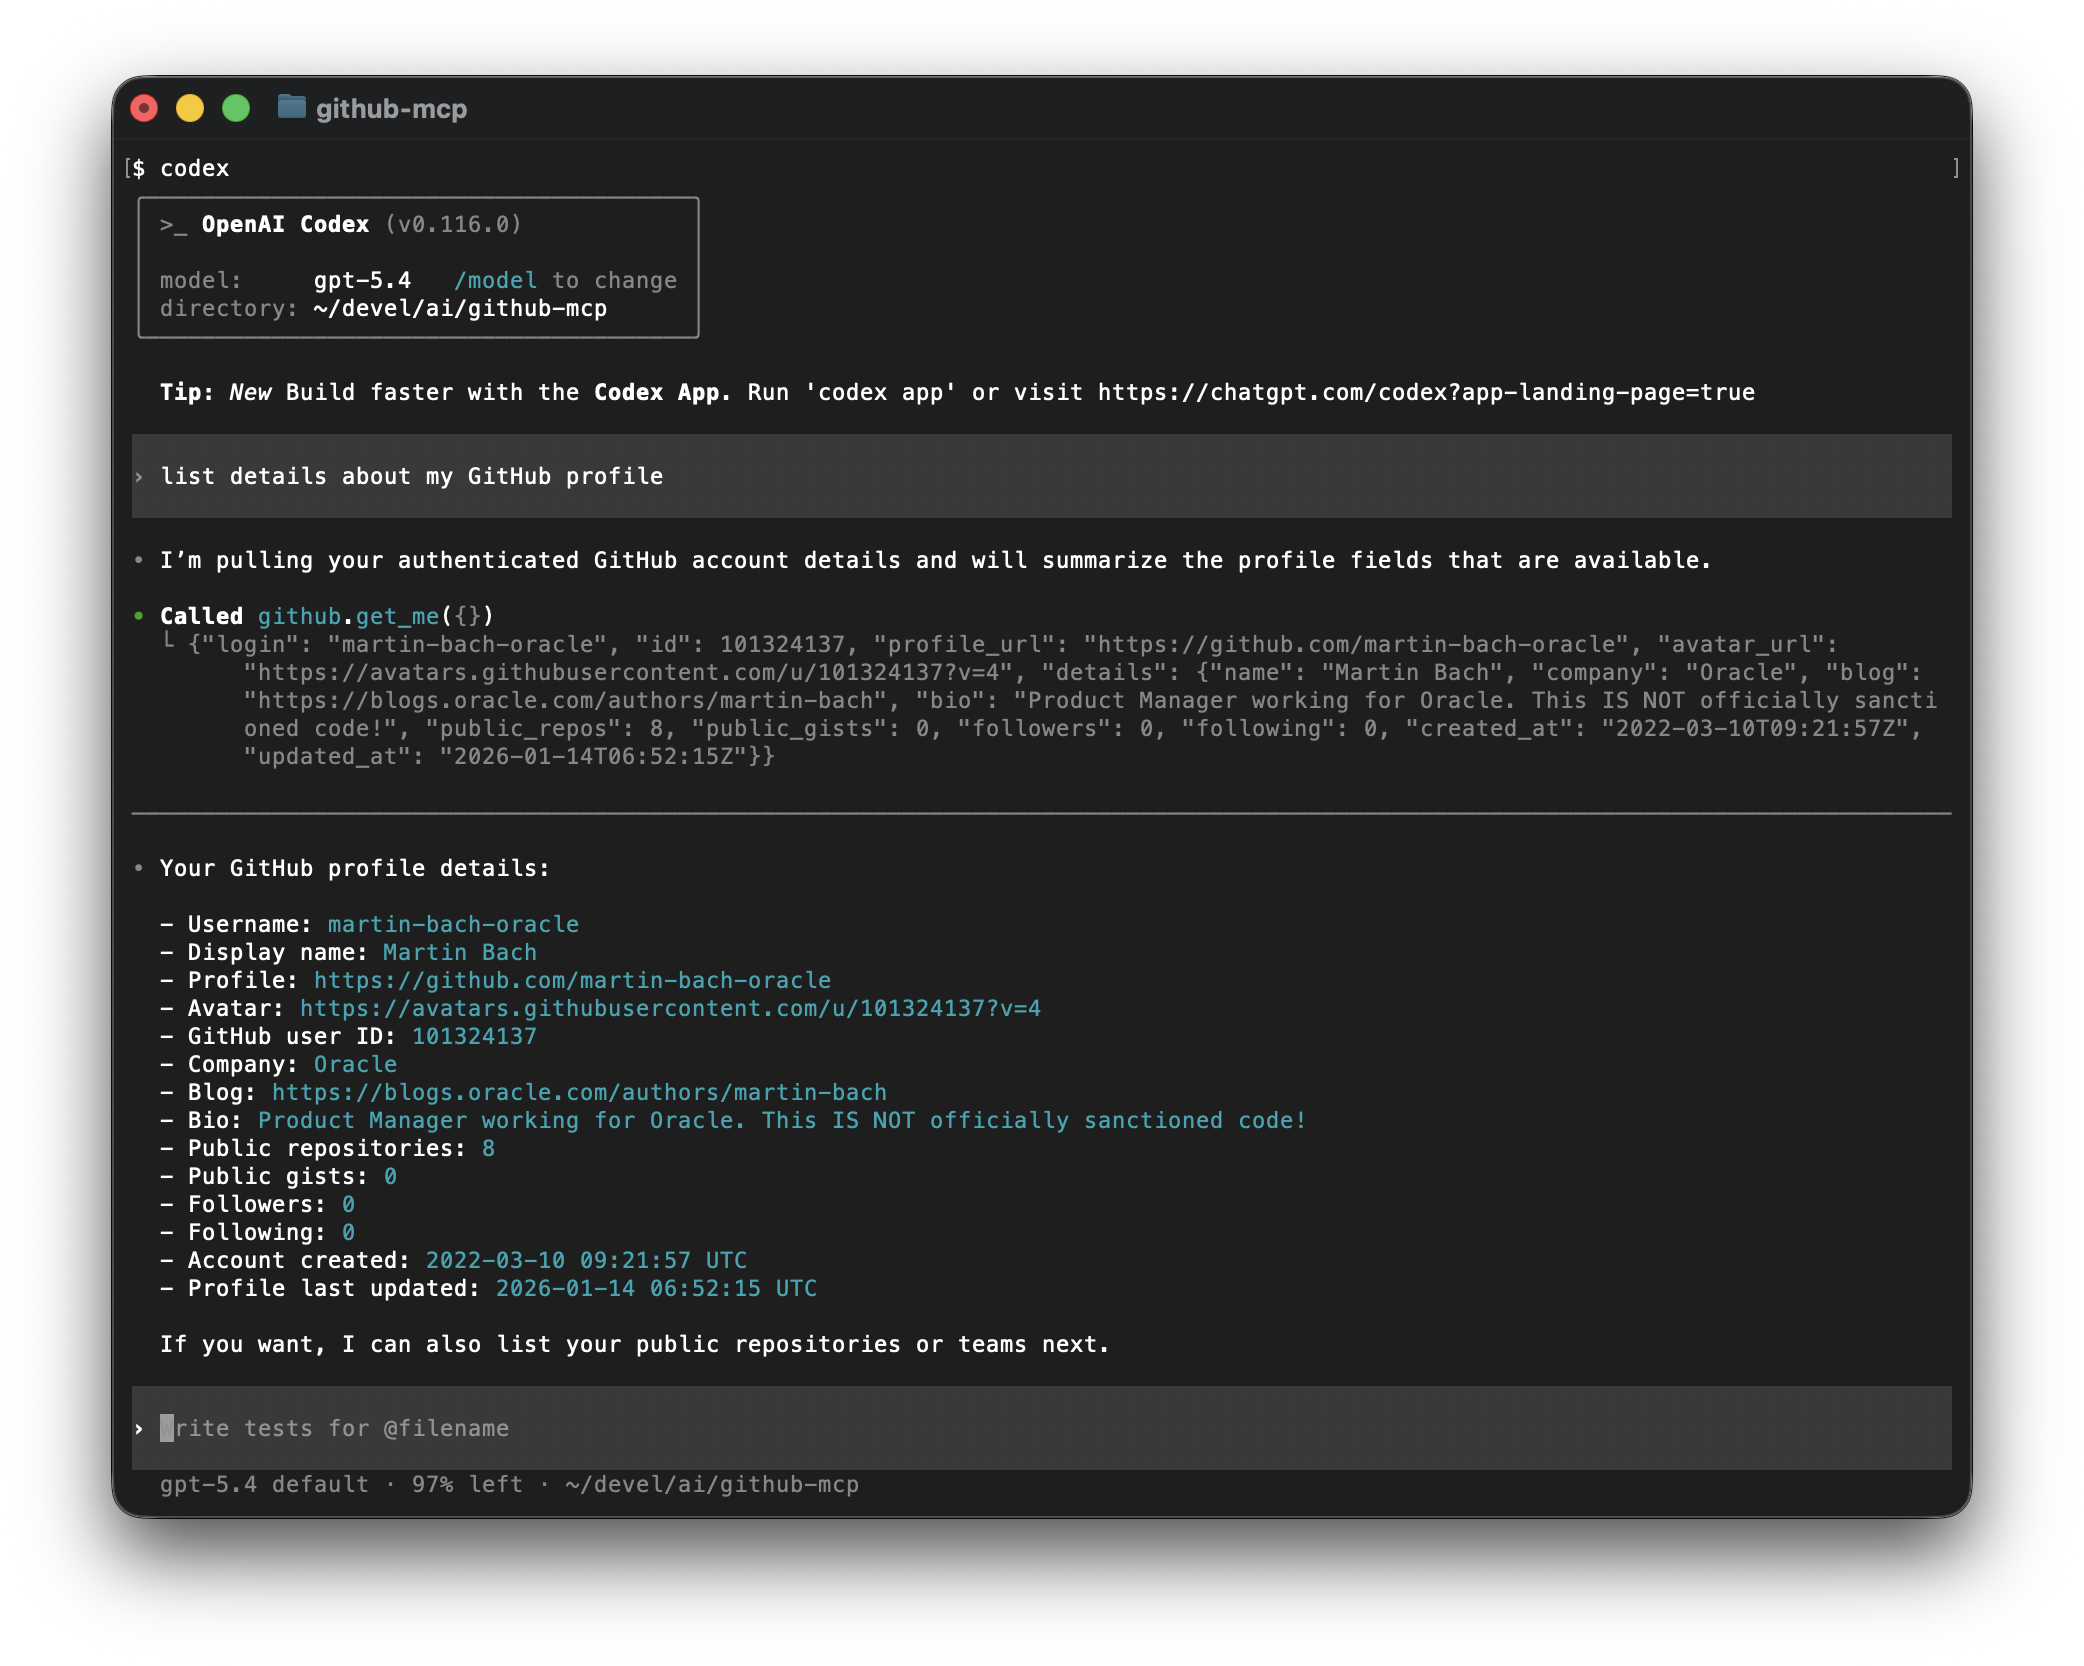
At that point, you are good to go. Use natural language to interact with your GitHub repository, create branches, open pull requests, and handle other tasks. For example:
Codex Plugin for VS Code
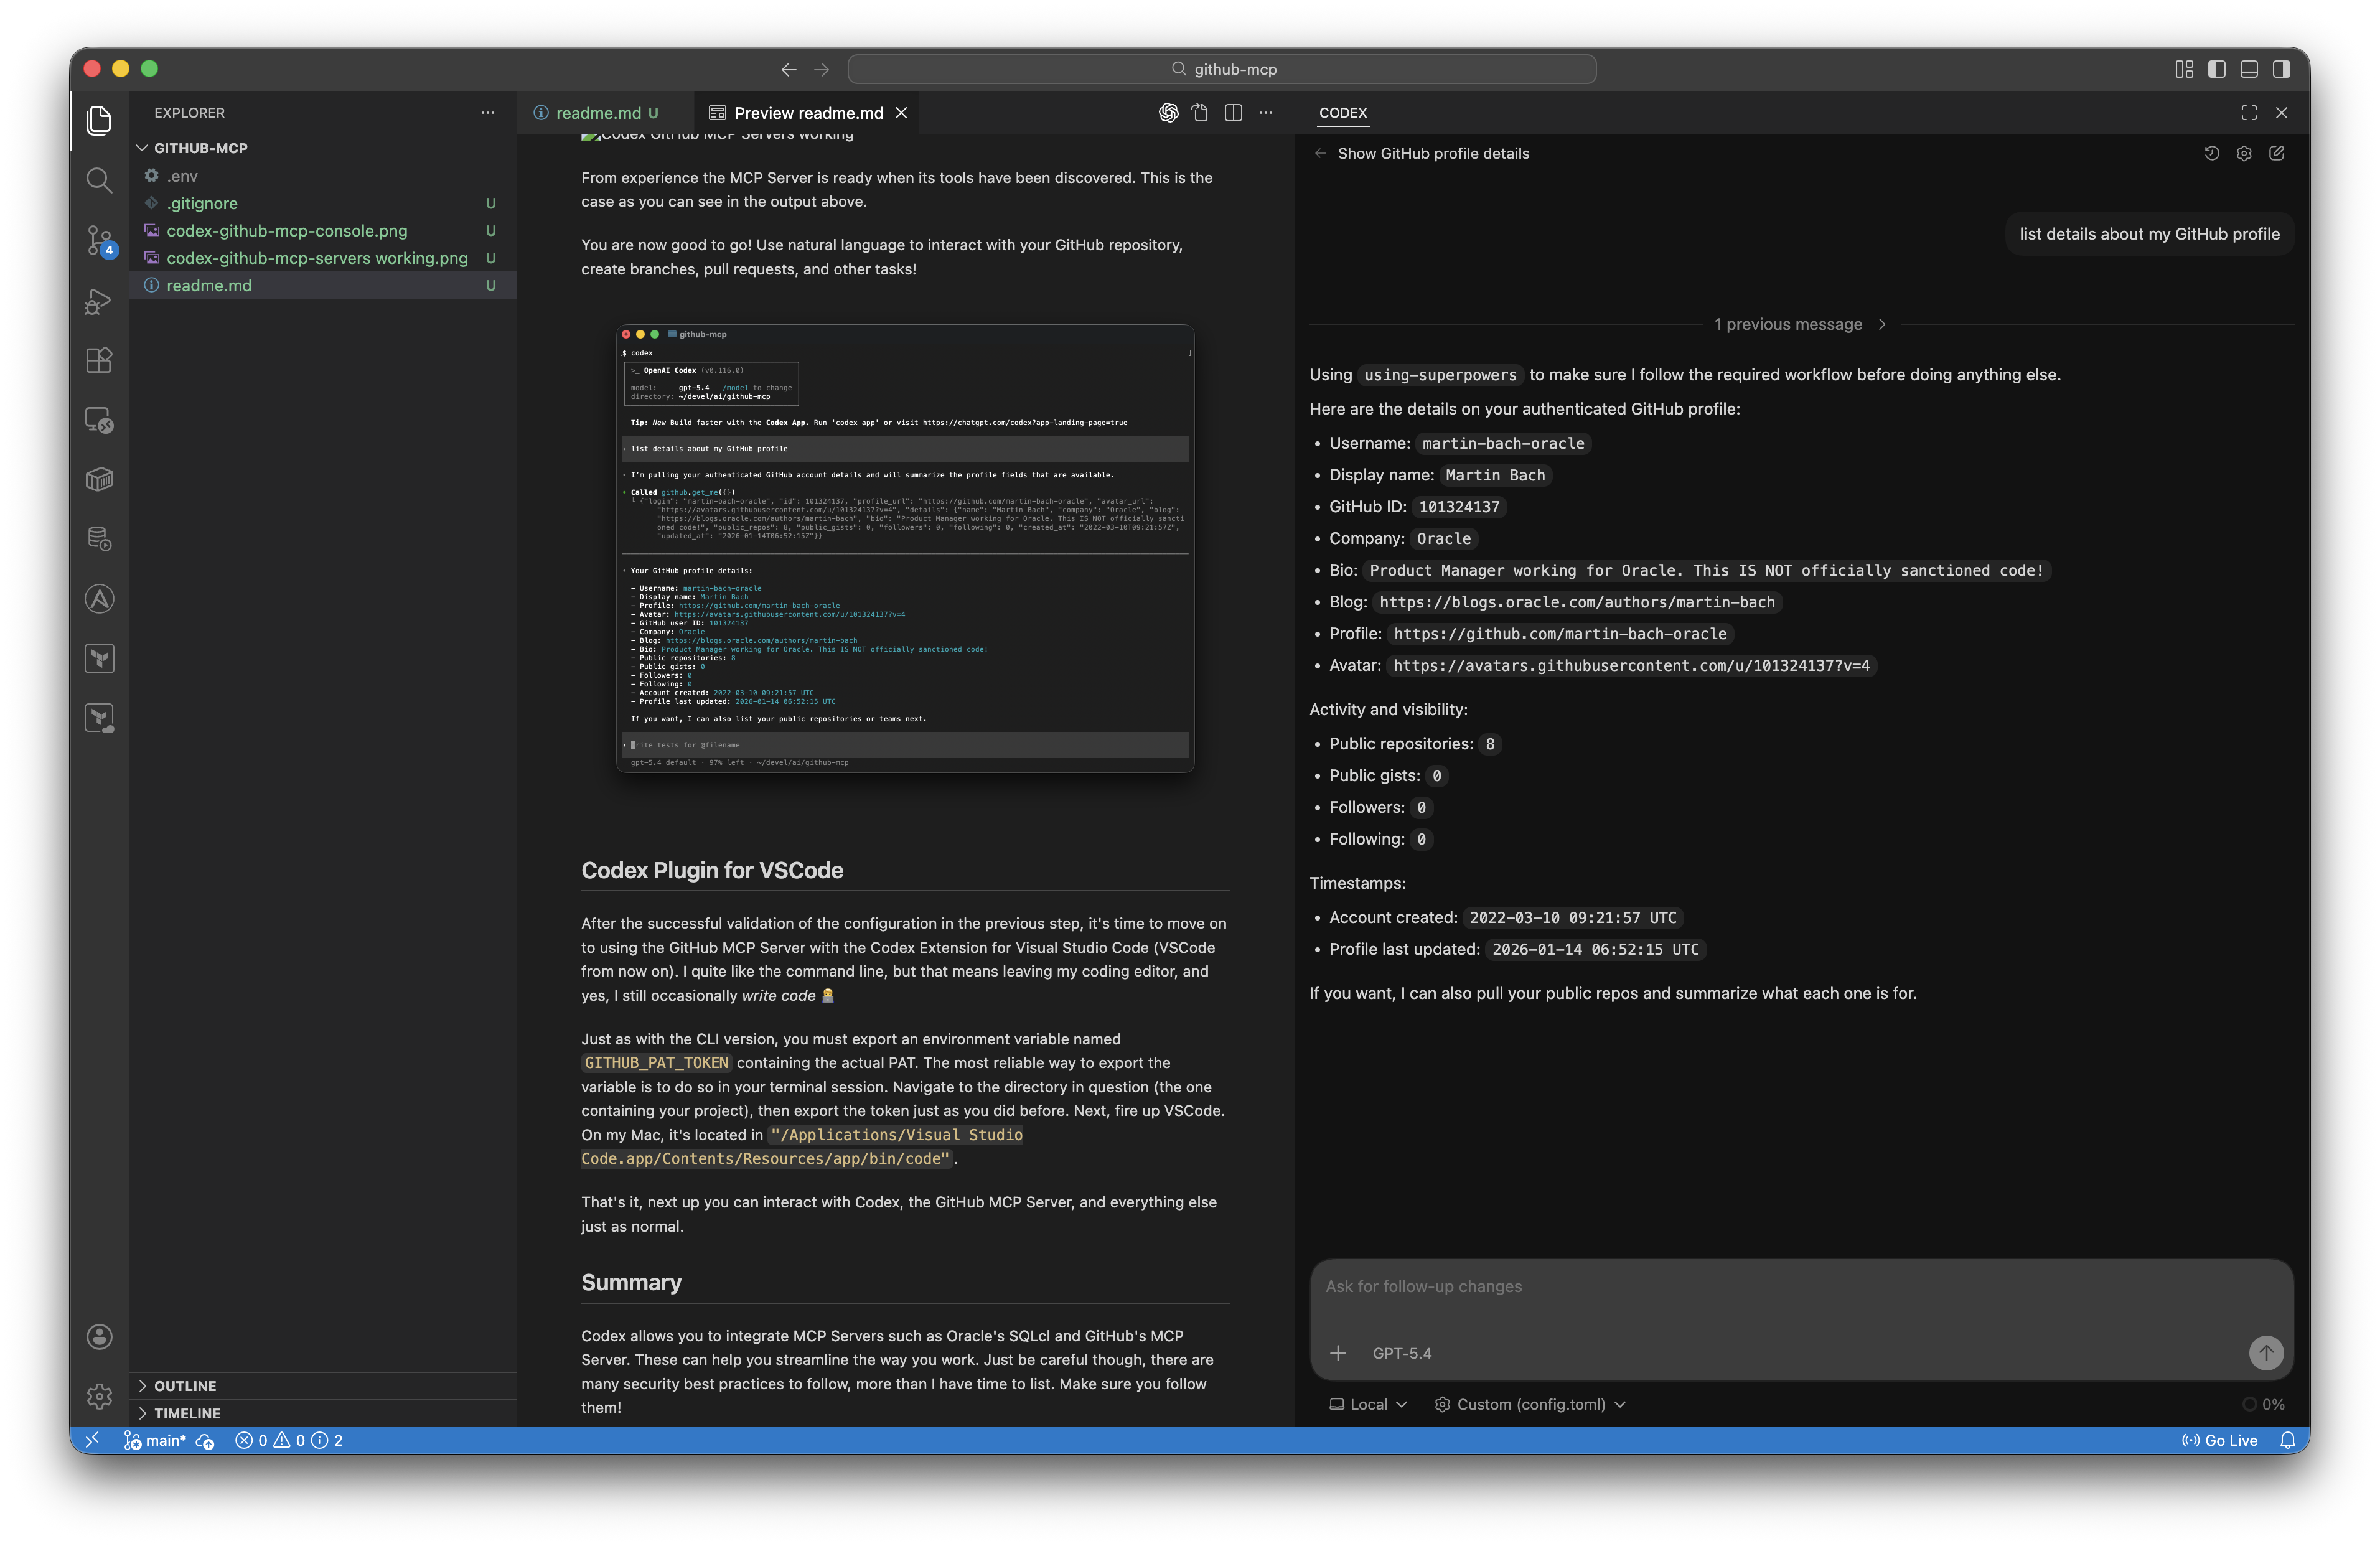
Once you have confirmed that the configuration works, it is time to move on to using the GitHub MCP Server with the Codex extension for Visual Studio Code (VS Code from now on). I quite like the command line, but it does mean leaving my editor, and yes, I still occasionally still write code 🧑💻
Just as with the CLI version, you must export an environment variable named GITHUB_PAT_TOKEN containing the actual PAT. The most reliable way to do that is in your terminal session. Navigate to your project directory, then export the token just as you did before. Next, fire up VS Code. On my Mac, it lives at "/Applications/Visual Studio Code.app/Contents/Resources/app/bin/code".
That is it. From there, you can interact with Codex, the GitHub MCP Server, and everything else as usual.
I tried saving the PAT in an .env file and ask Codex to read it, but that had very mixed success rates. In the end, exporting the PAT in your terminal is probably the most convenient way of doing so. I’d refrain from putting it into the global login files like .bash_profile, .bashrc or their zsh equivalents. It’s perhaps best to use the tokens on a need-to-know basis
Summary
Codex allows you to integrate MCP Servers such as Oracle’s SQLcl and GitHub’s MCP Server. They can help streamline the way you work. Just be careful, though: there are plenty of security best practices to follow, more than I have time to list here. Make sure you adhere to them, and ask if you’re in doubt.

You must be logged in to post a comment.